Looking for clear instructions to merge clips in Premiere Pro? Check out the steps to take and make it work fast.
In Premiere Pro you have two options to merge clips. You can use Premiere to merge two or more video clips into one. You can also sync audio and video together if they are recorded separately. Let’s talk about each of the two cases below.
Contents
How to merge video clips in Premiere Pro
When you want to merge two video clips in one, you are planning to combine clips. Premiere Pro is a perfect editor to help you with it. Premiere allows to combine video clips via these 3 methods.
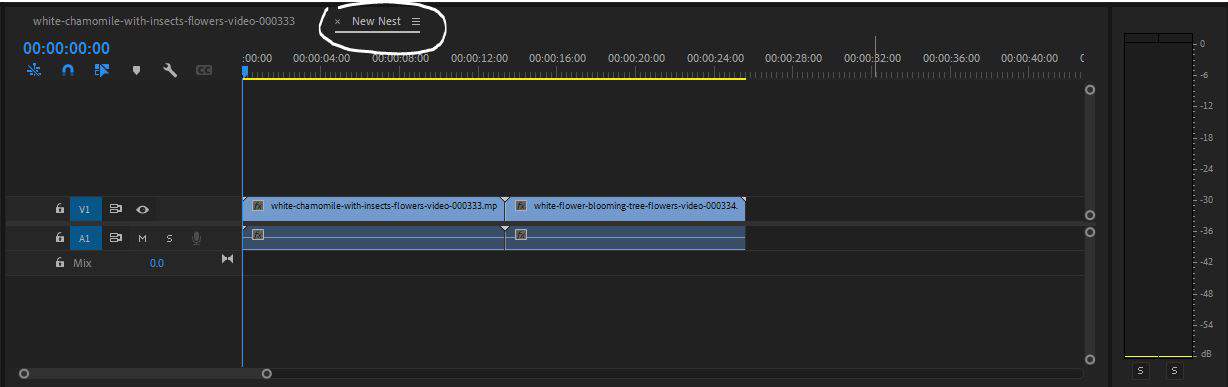
How to create a nested sequence in Premiere
You can merge clips by creating a nested sequence. By nesting your video clips you create a sequence which you can move around together and to which you can apply the same effects.
Here are the steps:
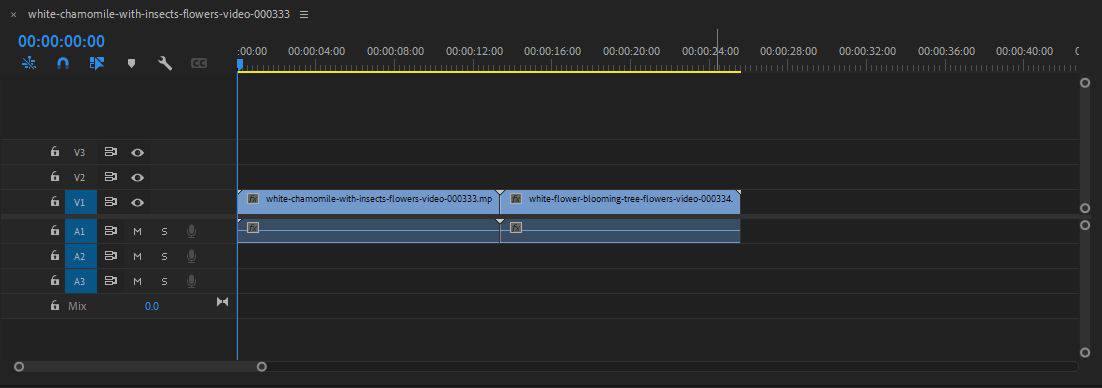
First, add video clips to your timeline and highlight those clips. You can highlight them by holding the Shift key on your keyboard and clicking on the clips with your mouse.
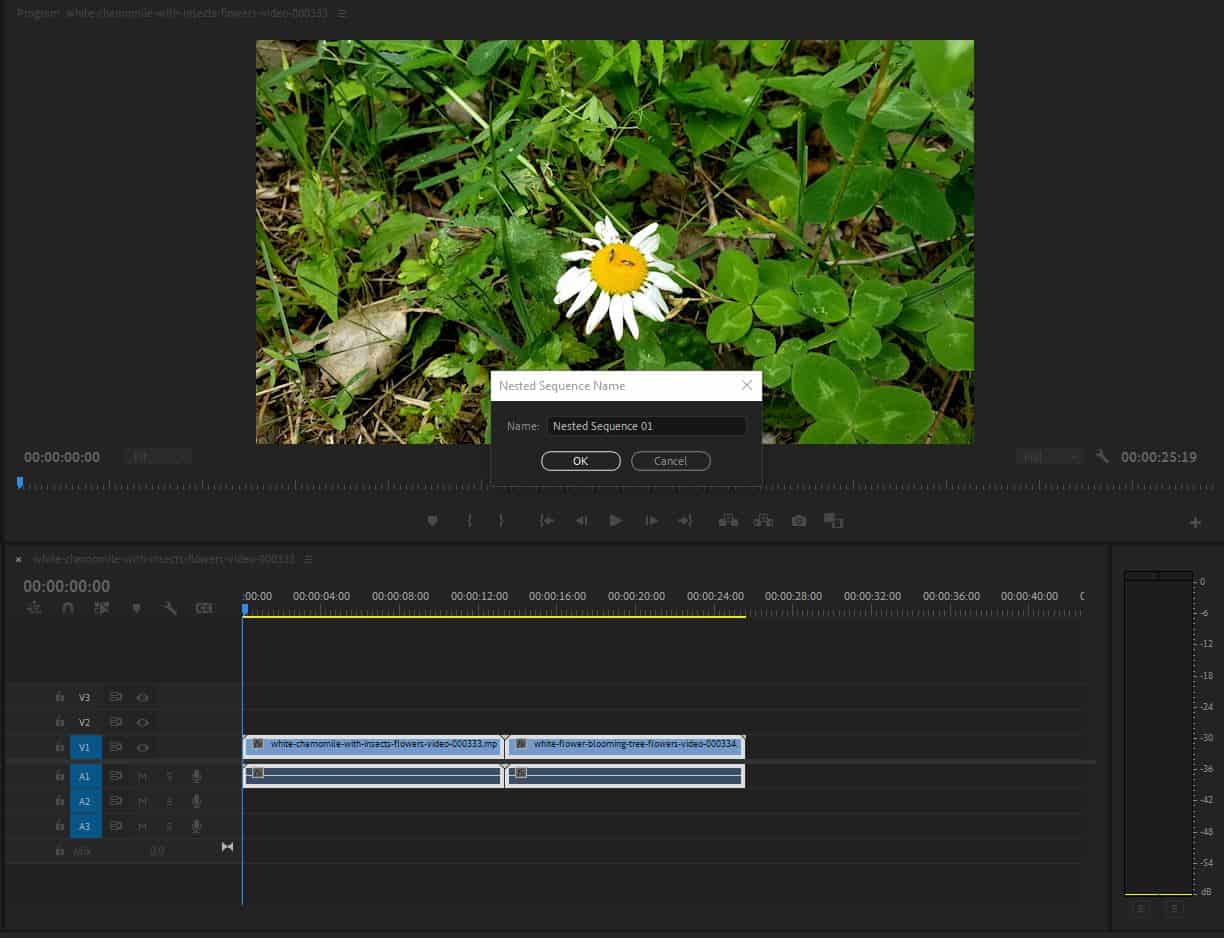
Second, right-click and choose Nest in the menu. Then name your new Nest sequence.
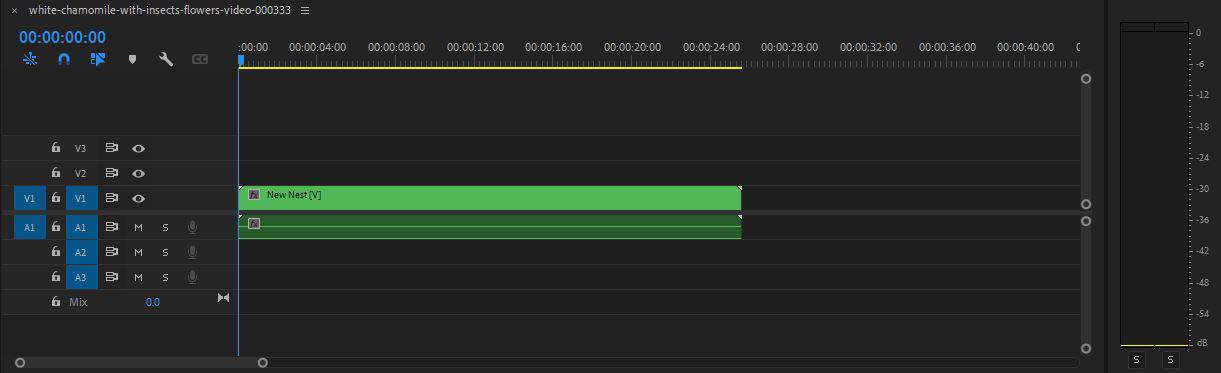
Now you have a nested sequence. You can now add an effect or color correction to the sequence, instead of going to individual clips.
When you double-click on the nested sequence, you will be able to have access to your clips again. This allows you to apply effects and color corrections to individual clips if ever you need to do so within the nested sequence.
Nesting within Premiere is similar to putting your clips into a container that you can open up easily. A nested sequence turns your combined clips into a single video.
The nest sequence is not ideal in all use cases. Let’s say you need to add the zoom effect to your clips. If you try to apply the effect to your nested sequence, it may be difficult to keep track of the particularities of the clips you’re using (resolution, frame rate).
How to create a subsequence in Premiere
Creating subsequences is as easy. When you’ve highlighted your clips, right-click and choose Make Subsequence.
You may not notice anything at first sight. Well, the new subsequence can be found in the Project tab on your left, next to Media Browser.
When you create a subsequence, you don’t compress the clips into one clip like you do with the Nest sequence. You use subsequences so that you can keep the video clips visible as separate clips on your timeline.
Why bother with the subsequence? You should use subsequences when you want to keep a backup sequence. Say, you have some footage that you need to keep as an original copy, so subsequence can help to preserve those videos intact.
How to group video clips in Premiere
If you apply effects and color correction to each video clip separately and you want to keep it that way, but you may need to move those clips around, you need to Group the clips.
Grouping the clips is easy, too. You highlight the video clips, right-click, and pick “Group” from the menu. Grouped videos can be dragged back and forth on the timeline. But you will not be able apply effects and color correction on them together like with the nest sequence.
Let’s sum it all up with this 2 minute tutorial about Nested sequences, Subsequences, Video Clip Grouping.
How to sync audio and video in Premiere Pro
Premiere Pro has a way to synchronize audio and video under the name Merge Clips. This function helps Premiere users sync audio and video when they were recorded separately.
Currently, Premiere Pro allows to select a video clip and sync it with up to 16 channels of audio with the help of Merge Clips.
Here is how you approach audio syncing to video in Premiere Pro.
- First, select the video clip. You can have only one video clip in any merged clip.
- Keep the Shift key on the keyboard and select the audio clip that you’d like to merge with the video clip.
- From the Clip menu in the top menu, choose Merge Clips…
- After this, the Merge Clips window will open.
Inside this dialog, you can choose one of the following options.
- Based on the In point: For locating sync based on the In point, at the clap of the slate.
- Based on the Out point: For locating sync based on the Out point, at the clap of the tail slate.
- Based on matching timecode: For locating sync based on common timecode between the clips.
- Based on clip markers: For locating a sync point based on a numbered clip marker in the middle of the shot. This function will be disabled unless all component clips have at least one numbered marker.
Once you choose your preferred option, click OK. The merged clip will appear in the Project panel. The name of the merged clip will match the video clip’s. You can always rename the merged clip for your convenience. Adobe Premiere Pro has more ways to merge audio and video. In this detailed list you can see all the ways to do so.
Need video clips for your projects? Check out these free video clip collections: